New to yoga and not sure where to start? These 11 poses are a practical first set. Start with the first eight, which are gentle and widely taught to beginners, then try the last three when you feel ready. Each pose has steps, a safety note and a reason people practise it. This is general guidance, not a medical programme.
Before you start
- Warm up gently, and practise on an empty stomach or a couple of hours after a meal.
- Move slowly and breathe through your nose. Stay for 3 to 5 breaths in most poses.
- Stretching should feel like a stretch, never like pain. If a pose hurts, come out of it.
- Props help: a folded blanket, a block or a strap make most poses easier.
- If you are pregnant, recovering from an injury or have a health condition such as high blood pressure, speak to a doctor first, and ideally learn with a qualified teacher.
The 11 yoga poses for beginners
- Vajrasana (Thunderbolt Pose)
- Dandasana (Staff Pose)
- Marjaryasana and Bitilasana (Cat and Cow)
- Malasana (Garland Pose)
- Trikonasana (Triangle Pose)
- Paschimottanasana (Seated Forward Bend)
- Setu Bandhasana (Bridge Pose)
- Bharadvajasana (Bharadvaja’s Twist)
- Vasisthasana (Side Plank), for later
- Urdhva Mukha Svanasana (Upward-Facing Dog), for later
- Natarajasana (Lord of the Dance), for later
Learn yoga in Rishikesh
Want to be taught in person? See our 200 hour yoga teacher training in Rishikesh, which welcomes beginners, and the fees and dates.
1. Vajrasana (Thunderbolt or Diamond Pose)
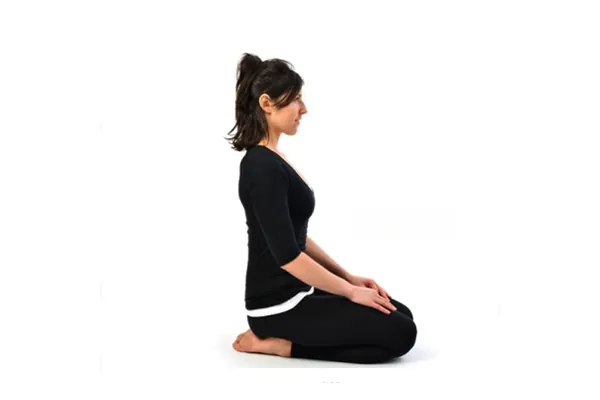
Vajra means thunderbolt or diamond, and asana means pose. Vajrasana is a simple kneeling pose that is often used for sitting and breathing.
How to do it
- Kneel on the mat with your knees together and the tops of your feet flat on the floor.
- Sit back on your heels, with your hands resting on your thighs.
- Lengthen your spine and relax your shoulders.
- Breathe slowly through your nose for 5 to 10 breaths, then come out.
Go gently: if you have knee or ankle pain, place a folded blanket between your calves and thighs, or sit on a cushion, or skip the pose.
Why people practise it: a calm, upright position for breathing and meditation.
2. Dandasana (Staff Pose)
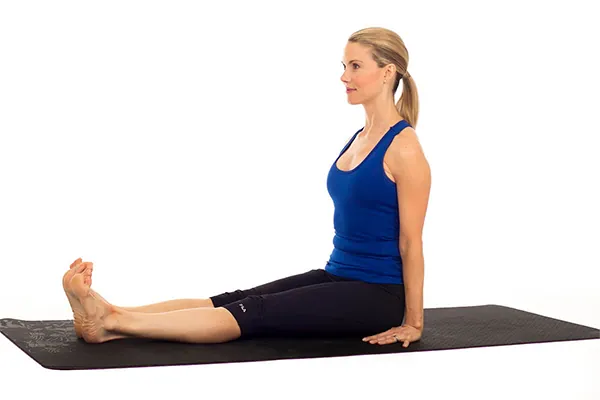
A seated pose that teaches you to sit tall with a straight spine. It is the starting point for many other seated poses.
How to do it
- Sit on the floor with your legs straight out in front of you and your feet together and flexed.
- Press your hips into the floor and lengthen the crown of your head up towards the ceiling.
- Place your palms on the mat beside your hips, lift your chest and draw your shoulder blades down your back.
- Stay for 5 slow breaths. To check your alignment, try the pose with your back against a wall.
Go gently: if your back rounds or your hamstrings feel tight, sit on a folded blanket.
Why people practise it: builds awareness of posture and works the muscles that hold you upright.
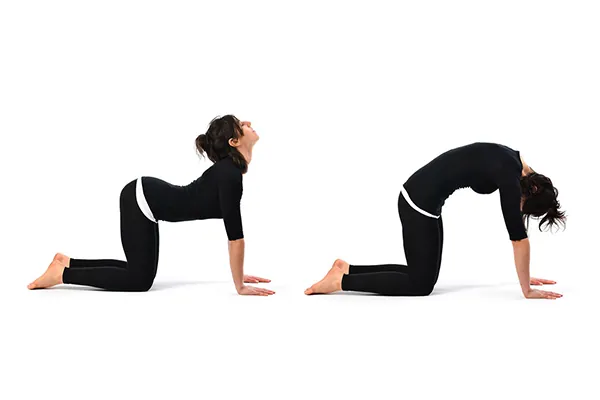
3. Marjaryasana and Bitilasana (Cat and Cow Pose)
A gentle flow that moves your spine with your breath. The names mean cat pose and cow pose.
How to do it
- Come onto your hands and knees, with your hands under your shoulders and your knees under your hips. Spread your fingers wide.
- Inhale: lower your belly, lift your chest and your tailbone, and look slightly forward (cow).
- Exhale: round your back towards the ceiling and tuck your chin (cat).
- Move slowly between the two for 5 to 8 rounds, matching each movement to a breath.
Go gently: if your wrists or knees hurt, place a folded blanket under your knees or come down onto your forearms.
Why people practise it: a gentle way to warm up the spine and connect movement with breath.
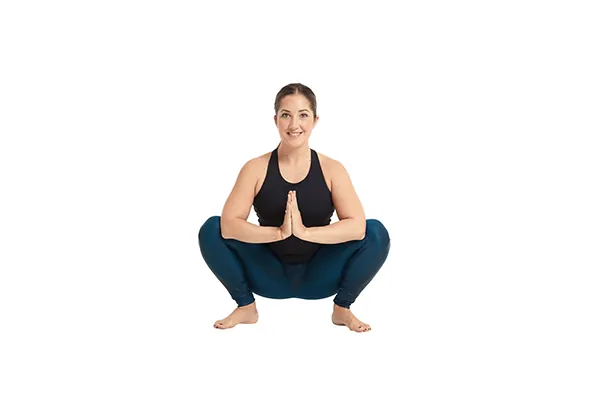
4. Malasana (Garland Pose)
A deep squat. The word mala means garland.
How to do it
- Stand with your feet a little wider than your hips and your toes turned out slightly.
- Bend your knees and lower your hips towards the floor into a squat.
- Bring your palms together at your chest and press your elbows gently against your inner knees to lengthen your spine.
- Stay for 30 seconds to 1 minute, then press into your feet and stand up slowly.
Go gently: if your heels lift, place a folded blanket under them or sit on a block. Skip the pose or ask a teacher to adapt it if you have knee, ankle or hip problems.
Why people practise it: opens the hips and strengthens the legs.
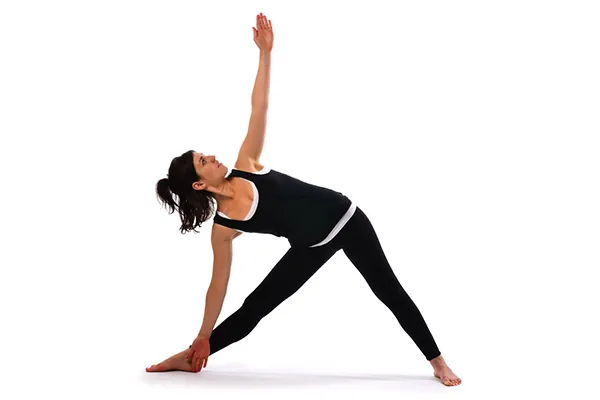
5. Trikonasana (Triangle Pose)
A standing pose that stretches the sides of the body. Trikona means triangle.
How to do it
- Stand with your feet about a leg length apart. Turn your right foot out 90 degrees and your left foot in slightly.
- Lift your arms to shoulder height and reach your right arm out over your right leg.
- Hinge from the hip and rest your right hand on your shin, ankle or a block. Reach your left arm up towards the ceiling.
- Keep your chest open, breathe for 3 to 5 breaths, then come up with an inhale and repeat on the other side.
Go gently: keep your neck comfortable and do not lock your front knee. Use a block if your hand does not reach the floor.
Why people practise it: stretches the legs, hips and sides of the body, and builds leg strength.
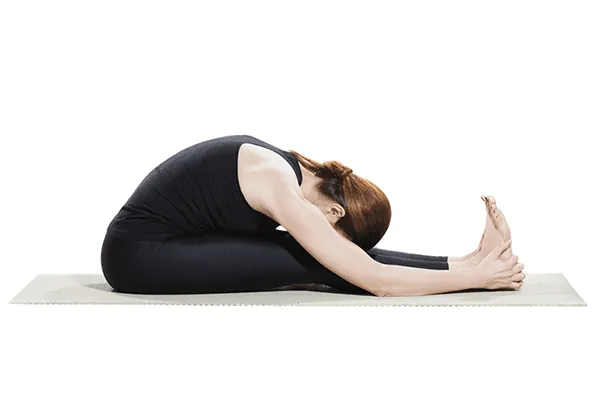
6. Paschimottanasana (Seated Forward Bend)
A forward bend that stretches the back of the body. Paschima means back or west.
How to do it
- Sit with your legs straight out in front of you, as in Dandasana.
- Inhale and raise your arms, lengthening your spine.
- Exhale and hinge forward from your hips, keeping your spine long, and rest your hands on your shins, ankles or feet.
- Stay for 5 breaths. To come up, inhale and lift your chest and arms.
Go gently: bend your knees or loop a strap around your feet if you cannot reach comfortably. Do not force the stretch or round your back to get lower.
Why people practise it: stretches the hamstrings and back, and many people find the forward fold calming.
7. Setu Bandhasana (Bridge Pose)
Setu means bridge and bandha means lock or bind.
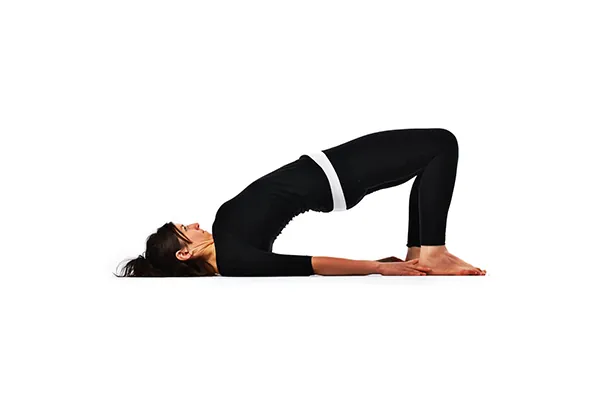
How to do it
- Lie on your back with your knees bent and your feet flat on the floor, hip-width apart, with your heels close to your hips.
- Rest your arms beside your body with your palms down.
- Inhale, press into your feet and lift your hips towards the ceiling.
- Keep your neck relaxed and do not turn your head. Stay for 3 to 5 breaths, then lower your hips slowly.
Go gently: if you have a neck problem, lift only a little. Ask a teacher about this pose if you are pregnant.
Why people practise it: strengthens the legs and back of the body and opens the front of the hips.
8. Bharadvajasana (Bharadvaja’s Twist)
A seated twist named after the sage Bharadvaja. The photo shows a variation with one arm behind the back; start without the bind.
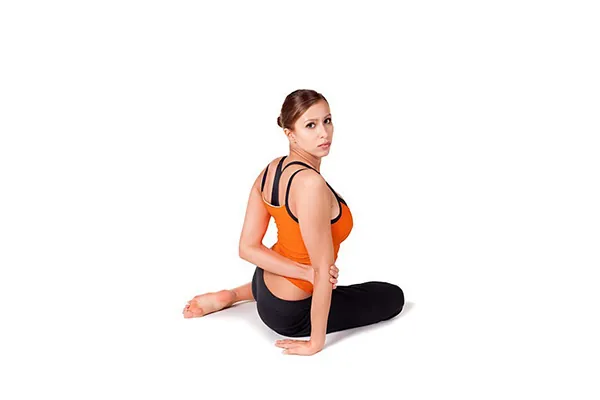
How to do it
- Sit on the floor with your knees bent and both feet to one side of your hips (the photo shows the feet to the left).
- Place one hand on the opposite knee and the other hand on the floor behind you.
- Inhale and lengthen your spine. Exhale and turn your chest and look over your shoulder, keeping both hips on the floor if you can.
- Stay for 3 to 5 breaths, then come back to the centre and change sides.
Go gently: twist from the middle of the back and never force it. Skip the pose if you have a back or knee injury.
Why people practise it: a gentle twist that lengthens the spine and loosens the shoulders.
Poses to try when you feel ready
These three poses need more strength, balance or flexibility. Learn the first eight poses first, and ask a teacher to check your form.
9. Vasisthasana (Side Plank Pose)
A balancing pose that builds strength in the arms and core. It is named after the sage Vasishtha.
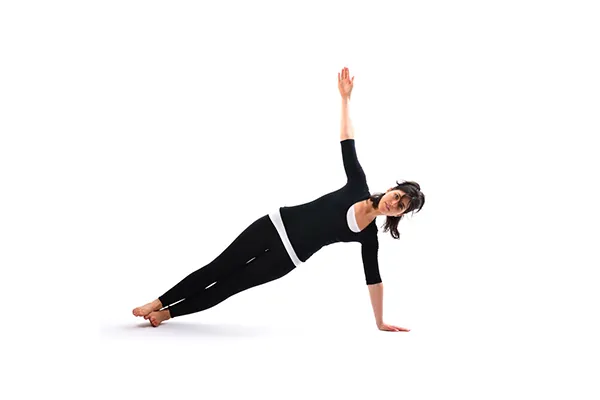
How to do it
- Start in a plank position with your hands under your shoulders and your body in one line.
- Shift your weight onto your right hand and turn onto the outer edge of your right foot, stacking your left foot on top. For an easier version, lower your right knee to the mat.
- Lift your hips and raise your left arm towards the ceiling.
- Hold for 3 to 5 breaths, then lower and repeat on the other side.
Go gently: skip the pose if you have wrist or shoulder pain.
Why people practise it: builds strength in the arms, wrists and core, and challenges balance.
10. Urdhva Mukha Svanasana (Upward-Facing Dog)
A backbend that is part of the Sun Salutation. It is similar to Cobra (Bhujangasana), which is a gentler way to start.
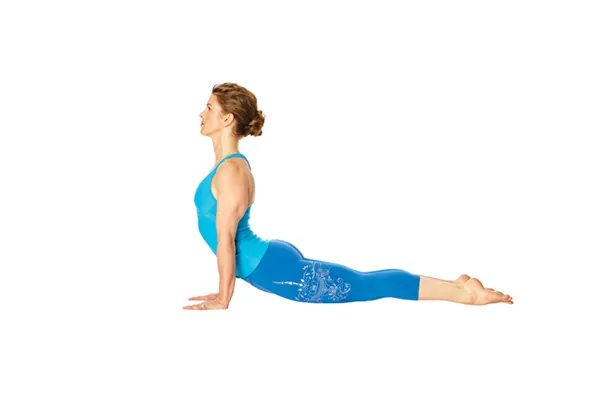
How to do it
- Lie face down on the mat with your legs stretched out and the tops of your feet on the floor.
- Place your hands on the mat beside your lower ribs.
- Press into your hands and the tops of your feet, straighten your arms and lift your chest and thighs off the floor.
- Draw your shoulders away from your ears, breathe for 3 to 5 breaths, then lower. For an easier version, keep your elbows bent and your thighs on the floor (Cobra).
Go gently: skip or adapt the pose if you have back, wrist or neck problems or are pregnant.
Why people practise it: strengthens the arms, wrists and back and opens the chest.
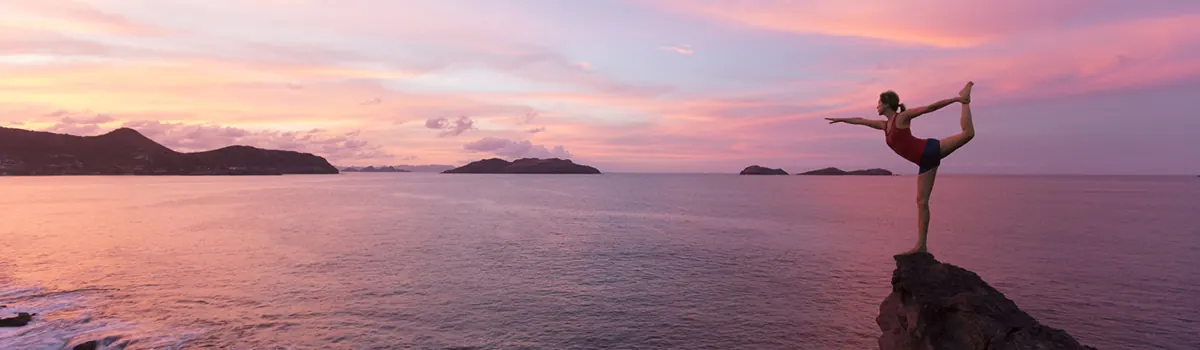
11. Natarajasana (Lord of the Dance Pose)
A balancing backbend, named after Nataraja, Shiva as the lord of the dance. It needs steady balance, so practise it near a wall at first.
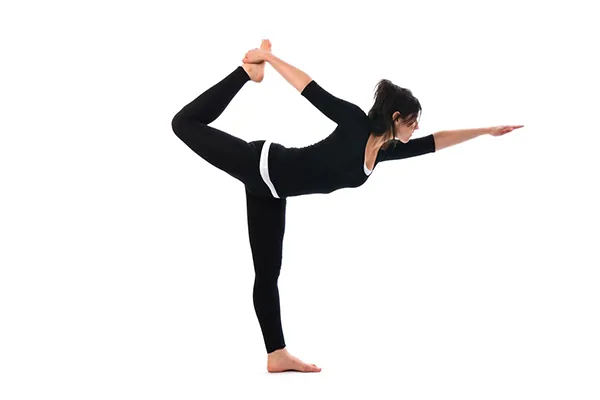
How to do it
- Stand in Mountain Pose, with one hand on a wall for balance if you need it.
- Shift your weight onto your right foot and bend your left knee, taking hold of your left foot or ankle behind you with your left hand.
- Lift your right arm and gently press your left foot back into your hand, keeping your chest lifted.
- Hold for 3 to 5 breaths, release slowly and repeat on the other side.
Go gently: use a strap around your foot if you cannot reach it. Skip the pose if you have knee, back or balance problems.
Why people practise it: builds balance and focus and stretches the thighs and chest.
Keep going
Once these poses feel comfortable, try the 12 steps of Surya Namaskar, the gentler Chandra Namaskar (Moon Salutation) and our guide to how to meditate. This guide was written by the Rishikesh Yoga Teacher Training Center team. It describes general yoga practice and is not medical advice.