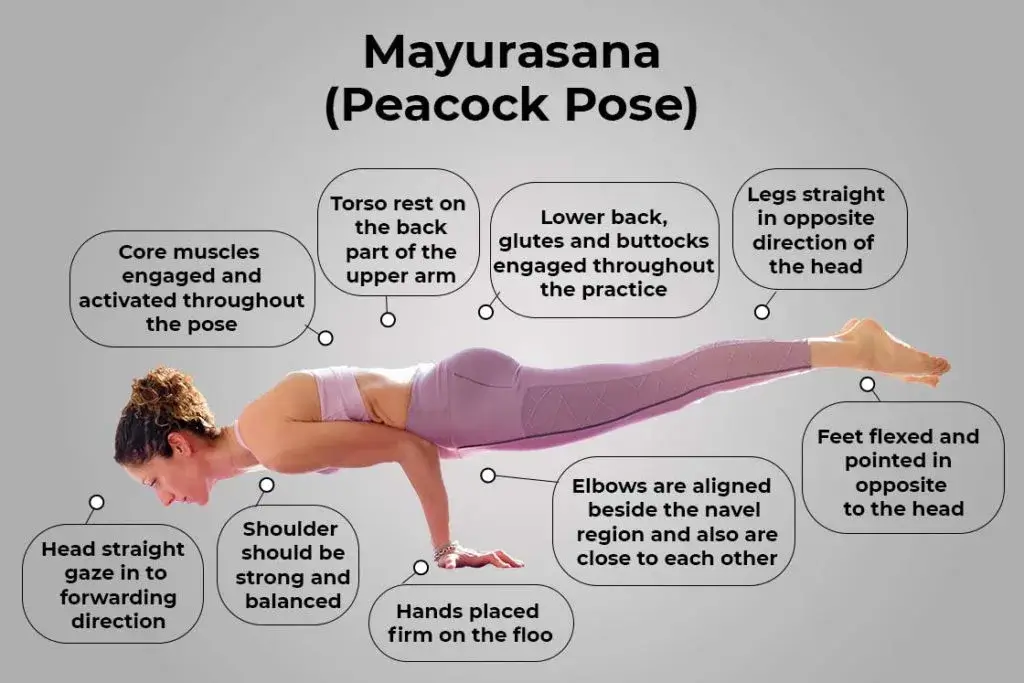
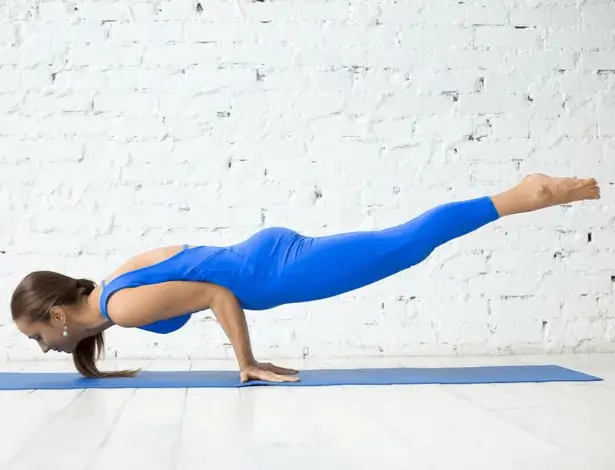
Mayurasana (Peacock Pose) is an arm balance. You rest your belly on your bent elbows, lean forward and lift your legs and head off the floor so that the body is held straight out like a horizontal stick. Mayura means peacock and asana means pose. It is an advanced pose that takes strong wrists, forearms and core, so most people build up to it over weeks or months with the prep poses below.
Mayurasana is one of the oldest non-seated poses in hatha yoga. It is first described in the 10th-century text Vimanarcanakalpa. This guide covers the steps, the poses that prepare you, easier options and who should not practise it. It is general guidance, not medical advice, and a teacher should check your form.
Before you try Mayurasana
- Practise on an empty stomach, and warm up your wrists first: kneel on the mat and gently rotate and stretch your wrists for a minute.
- Use a non-slip mat, and place a folded blanket on the mat in front of you so your forehead has something soft nearby.
- Learn it with a teacher if you can. A fall forward onto the face is the main risk.
- Stop at once if you feel wrist pain, dizziness or pressure in your head.
How to practise Mayurasana step by step
- Kneel on the mat with your knees wide apart and your big toes together.
- Place your palms on the mat between your knees, with your fingers pointing back towards your feet. Press your palms down firmly.
- Bend your elbows and bring them together, then set them on your belly just below the navel, one on each side of the centre line.
- Lean slowly forward until your chest rests on the backs of your upper arms. Look ahead, not down.
- Stretch your legs back one at a time and press your toes into the floor. Keep your legs together and straight.
- Shift your weight forward and lift your feet off the floor, so that your body is straight and level with the floor and only your hands touch the ground.
- Hold for a few breaths. Start with 5 seconds and add time slowly.
- Lower your feet and then your knees to the mat, and rest in Child Pose (Balasana) for a few breaths.
Go gently: do not try to hold it for a long time. Several short, controlled attempts are better than one long, shaky one.
Peacock Pose (Mayurasana) step by step
Looking for a perfect Yoga Teacher Training in Rishikesh?
Learn arm balances and other advanced poses with a teacher on our 200 Hour Yoga TTC, 300 Hour Yoga TTC or 500 Hour Yoga TTC. You can also try our 7 day and 15 day yoga retreat in Rishikesh.
Poses that prepare you for Mayurasana
- Wrist warm-up: on hands and knees, turn your fingers to point back at your knees and lean back gently. This is the same hand position you use in Mayurasana.
- Plank Pose: builds strength in the arms, shoulders and core.
- Chaturanga (low plank): teaches you to keep the elbows close to the body.
- Boat Pose (Navasana): strengthens the abdominal muscles and the muscles that hold the spine straight.
- Crow Pose (Bakasana): the first arm balance for most people; it trains you to shift your weight forward over your hands.
- Forearm plank: builds the strength to carry your weight on your arms.
Easier options and common mistakes
- Keep the knees on the floor: do steps 1 to 5 and rest your chest on your upper arms with your knees and toes on the mat. Do this until the position feels stable.
- Lift one leg at a time: once steady, lift one foot for a breath, then the other, before you lift both.
- Elbows too wide: elbows that drift apart will not support your weight. Keep them together and pressed gently into the belly.
- Looking down: this tips you forward. Keep your gaze ahead, and keep your neck long.
- Holding the breath: breathe slowly through your nose. If you cannot breathe, come out of the pose.
- Fingers pointing the wrong way: fingers forward is a related pose called Hamsasana (Swan Pose). In Mayurasana the fingers point back towards the feet.
Why people practise Mayurasana
Many people practise Mayurasana to build strength in the wrists, forearms, shoulders and core, and to develop balance and focus. Traditional yoga texts and teachers describe other effects, such as on digestion, but these are traditional claims that have not been shown by good research, so we do not present them as medical facts. Mayurasana does not treat or cure any condition, including diabetes, fever or fertility problems.
Who should not practise Mayurasana
Avoid the pose, or ask a doctor and a qualified teacher first, if any of these apply:
- You are pregnant.
- You have a wrist, elbow or shoulder injury.
- You have high or low blood pressure, heart disease, a hernia, a peptic ulcer or tuberculosis.
- You have a slipped disc, or back, neck or migraine problems.
- You feel dizzy, or have acidity or an upset stomach that day.
Pain in the pose is a signal to stop. Come down and rest, and speak to a teacher or doctor if it continues.
Common questions
Is Mayurasana difficult?
Yes, it is an advanced arm balance. Most people need regular practice of the prep poses first, and many take months. Progress at your own pace.
How long should I hold Peacock Pose?
Start with about 5 seconds and increase slowly as you gain control. Stop before your wrists or arms begin to shake or ache.
What is the difference between Mayurasana and Crow Pose?
In Crow, your knees rest on the backs of your upper arms and your fingers point forward. In Mayurasana, your belly rests on your elbows, your fingers point back, and your legs are straight behind you.
Can I practise Mayurasana every day?
Many teachers suggest a few times a week with rest days, because the wrists and forearms need time to recover. Follow your teacher’s advice.
Where can I learn arm balances in Rishikesh?
You can learn them as part of a 200 hour yoga teacher training in Rishikesh. See also our guides to yoga poses for beginners and Trikonasana.
Source: Wikipedia, Mayurasana (name, history and the Hamsasana variation). Written by the Rishikesh Yoga Teacher Training Center team. This is general yoga guidance, not medical advice.